Difficulty: 🔧 🔧 out of 5 Wrenches
Time: 60 – 90 Minutes
Tools:
-
3/8” Drive Ratchet
-
Oil Catch Pan
-
Differential Gasket (LubeLocker D44 for JK Wrangler)
Step 1: Clean the area immediately surrounding the differential housing and diff cover.
While this may seem excessive, it’s better than having mud or external debris contaminating your fresh differential fluid. Let’s face it; If you are changing the diff fluid, upgrading the factory diff cover, or fixing a pesky fluid leak yourself, there is a good chance you’ve been off-road. The recesses for the bolt heads on my Poison Spyder diff cover were absolutely caked in dirt. Cleaning the exterior was necessary for the socket to fit on the bolts!
Step 2: Drain the differential fluid.
To help the oil drain faster you may drive the vehicle for 10-15 minutes before you begin, if desired.
Place the drain pan beneath the drain plug on the axle housing. Before removing the drain plug, loosen the fill plug first. Why? If there is an unexpected issue removing the fill plug, wouldn’t you like to know before draining the diff fluid?
Using the ⅜” ratchet, insert the head directly into the fill plug and turn counter-clockwise to loosen. Next, you’ll remove the drain plug in the same manner and let the oil drain for a few minutes.
Once the oil has finished draining, reinsert the drain plug and torque to factory specifications.

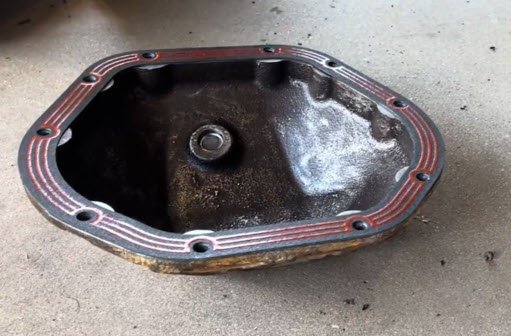
Step 3: Remove the differential cover.
Use a socket to remove the differential cover bolts. To navigate around the rear track bar, you may need to use an extension for some of the bolts. Leave 2-3 upper bolts loosely tightened for now. This will prevent the cover from falling unexpectedly once you break the seal.
Carefully separate the cover from the axle housing using a thinner pry bar or hammer and screwdriver to remove the diff cover from the axle housing. Take care not to mar the surface of the axle housing or it may be difficult for the LubeLocker to create a proper seal.
The remaining gear oil will drain once the diff cover is separated, so keep the oil pan in place here too.
Remove the bolts left in place earlier to hold the cover and remove if from the axle housing.

Step 4: Clean and prepare the mounting flange of the axle housing.
For a proper seal, the mating surface of the housing and the diff cover should be clean and free from the old gasket or RTV sealant. A gasket scraper or simple straight blade (when used carefully) will remove the larger pieces of gasket fairly easily.
A wire wheel makes quick work of the remaining bits of the gasket and is highly recommended.
Clean inside the differential housing.
Remove as much residual gear oil as possible and perform a light inspection while you have easy access. You’re looking for anything unusual like excessive metal shavings or damage to the ring and pinion.
Whether you go au natural, or douse it with brake cleaner, take care not to introduce anything foreign into the housing. If you are using a rag, ensure it is lint-free. If you are using brake cleaner, ensure the housing is completely dry before mounting the cover. I kept it simple and used disposable shop towels only. I regularly change my diff fluid and didn’t feel the need for anything stronger after inspection, but understand why some would want something stronger too.
Step 5: Clean inside the differential cover and the mounting flange in a similar manner.
Step 6: Place the LubeLocker gasket on the mounting flange of the diff cover and reinstall the cover.
As with most differentials, the Dana 44 LubeLocker has a specific orientation due to the shape of the cover. Each side of the LubeLocker is the same, however.
Line up the LubeLocker with the bolt holes inside the diff cover, ensuring there is a clear path for all of the bolts. Place a couple of bolts from the outside of the diff cover through the LubeLocker to keep the gasket in place while mounting it.
Hand-tighten those bolts to hold the cover in place in preparation for the torque procedure.
Step 7: Torque the differential cover bolts in sequence.
The proper way to torque the diff cover is in two phases, each following the same torque sequence. Similar to your lug nuts, torquing in sequence helps ensure a flat mating surface and evenly distributes the clamping load.
The final torque specs may differ depending on which diff cover you are using. Follow the manufacturer’s specs if you are using the factory cover and hardware. If you have an aftermarket upgrade, those torque specifications may be followed.
According to the interwebs, the Dana 44 differential cover bolts for my JK Wrangler ask for 30 ft. lbs. of torque. After a little research, I settled on 25 ft. lbs. of torque when reinstalling the cover. There seems to be an occasional issue with broken bolts when torquing up to 35 ft. lbs. (LubeLocker recommendation) and I would rather tighten my cover later than deal with a broken bolt upon installation.

Torque sequence for a Dana 44 axle.
Step 8: Fill the differential with the proper amount of diff fluid.
I’ve had some success squeezing a quart bottle between the rear suspension components. Using a manual fluid transfer pump, however, makes filling the differential much easier, and is a must for other jobs like refilling the transfer case fluid.

Comments are closed